Planting/Basic Care
Planting Overview
1. Plant in partial to full sun in areas with good drainage
2. Dig a hole 6-8 inches deep and mix granular fertilizer at the bottom of the hole with soil
3. Place bulbs 2-3 inches apart and then cover, slightly packing the soil
4. Water (if soil is dry)
1. Plant in partial to full sun areas that drain
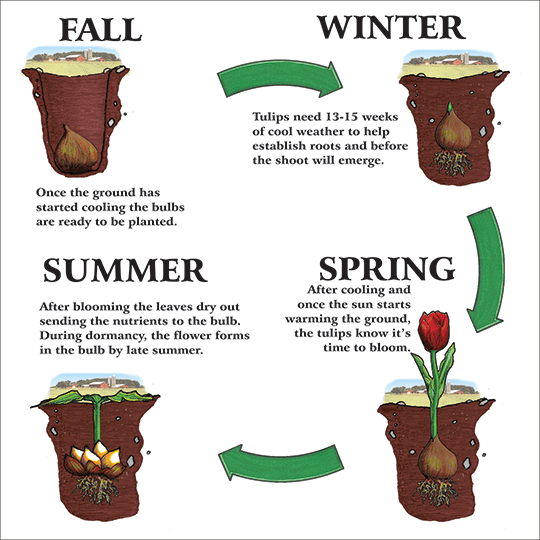
Tulip bulbs are just the dormant stage of the plant and just like a butterfly cocoon, just need the right conditions to turn into something beautiful. First, it is important to plant the bulbs when you receive them. For us in the northern hemisphere, this is September and October, before the ground freezes. Too high of a soil temperature creates an environment for many diseases that attack bulbs. For this reason we recommend that you don’t plant your bulbs in the fall until the temperatures start to cool. (soil temperatures fall below 60 degrees)
Plant your bulbs in partial to full sun so they don’t spend extra energy looking for light. Plants in full dark will be taller, thinner-stemmed and weaker as they look for light. The extra energy spent looking for light also makes them more susceptible to disease and less likely to bloom again.
Be sure to plant in well-drained soil. Most bulbs will rot in standing water so avoid areas prone to flooding such as the bottom of hills or especially under drainpipes!
Each garden contains its own micro climate. Bulbs planted against the southern side of your house may bloom up to a week earlier than the same ones planted on the north side. Bulbs planted in dense shade may be twice as tall as those planted in full sun. Cities tend to be warmer than rural areas. Bulbs planted by a warm sidewalk may push out of the ground earlier due to the warmth absorbed by the concrete. Early shoot growth in the fall doesn’t seem to affect the bulbs ability to bloom in the spring.
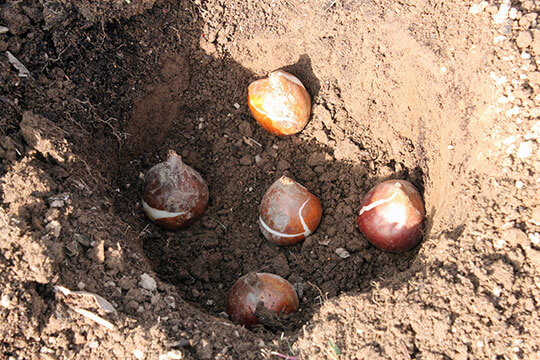
2. Dig a hole 6-8 inches deep and mix granular fertilizer into bottom soil
Dig a hole a few inches deeper and wider than the bulbs you are planting. Place bulb fertilizer in the bottom per directions and cover with a little soil. Gravitropism is a big word that means your bulbs are internally programmed so that the roots grow down and the shoots up! So relax if you think your 3 year old planted them upside down, the bulbs will figure it out. The only exception is Hyacinths they will grow upside down if you plant them with the point side down.
3. Place bulbs 2-3 inches apart in hole, cover, pack soil
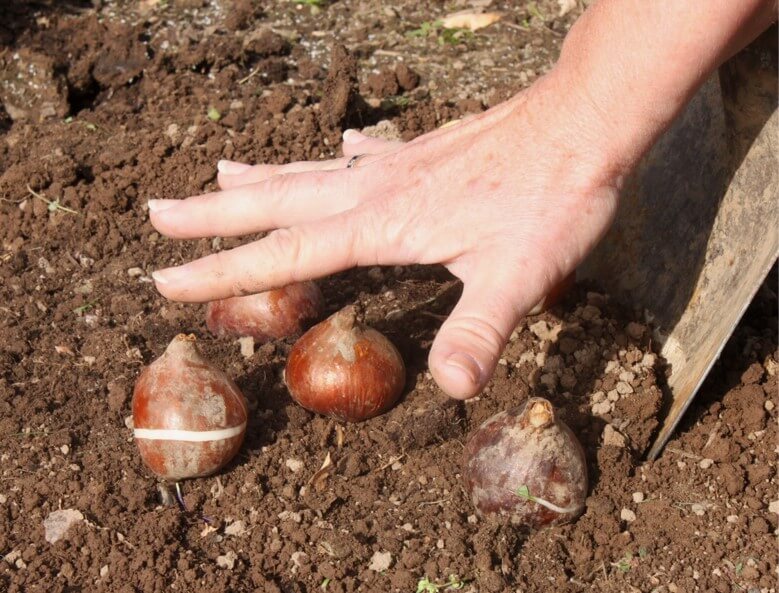
Tulips and daffodils are usually planted 6-8 inches deep and 2-3 inches apart. Officially spring blooming bulbs are planted 2.5 times deeper than the bulb is wide.
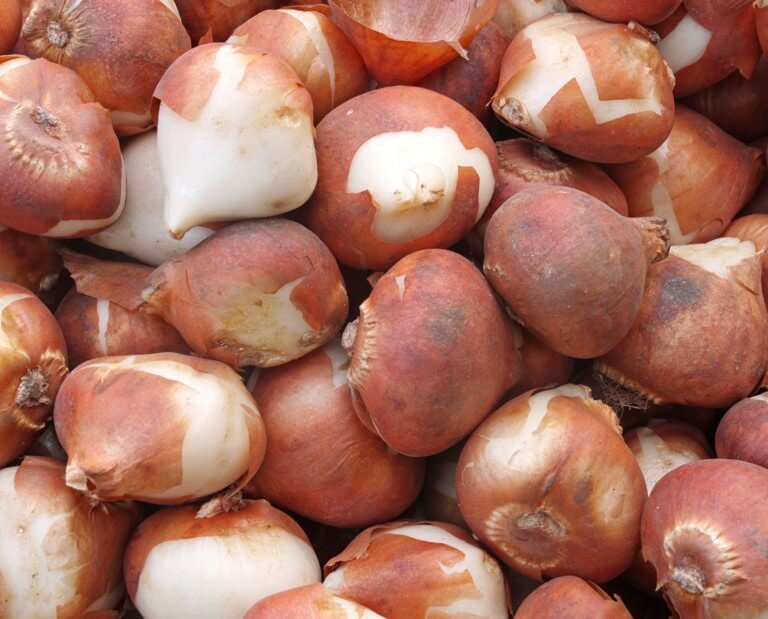
The brown outer covering of a tulip is called a tunic. This often protects the bulb early in the summer but by the time we ship them to you, these have broken off or cracked. This doesn’t hurt the bulb and actually makes it easier for the bulb to root.
4. Water (if soil is dry)
Water is critical for spring flowering bulbs. Water your bulbs after planting unless it has already started to rain and the soil is moist. Water is needed in late winter and early spring when the plants emerge. At this time most bulbs require about 17mm of water a week. This is especially critical for potted bulbs where missing a watering can result in an aborted flower or yellowing foliage. After flowering however, it is natural for the foliage to yellow and dry out. When this starts to happen, discontinue watering.
Basic/Continual Care
- Fertilize with granular bulb fertilizer
- Inspect foliage tips
- Snap off Heads after bloom
- Dig Every 3-4 Years for Ground planting
1. Fertilize with granular bulb fertilizer
Fertilize with granular bulb fertilizer in the late winter/early spring when the greenery first shows up. Liquid fertilizer can be used on the leaves when bulbs are blooming. We use a 4-12-12.
2. Inspect foliage tips
In late January and February, inspect for “fire heads” on tulips. This appears as gray fuzz on the tips of the foliage. These are actually botrytis spores and can spread to all your tulips. Pull out the entire infected plant and bulb, and discard to control the disease. Botrytis is called Fire Flight because of its rapid spread (do not mulch diseased plants; it will only create a bigger problem).
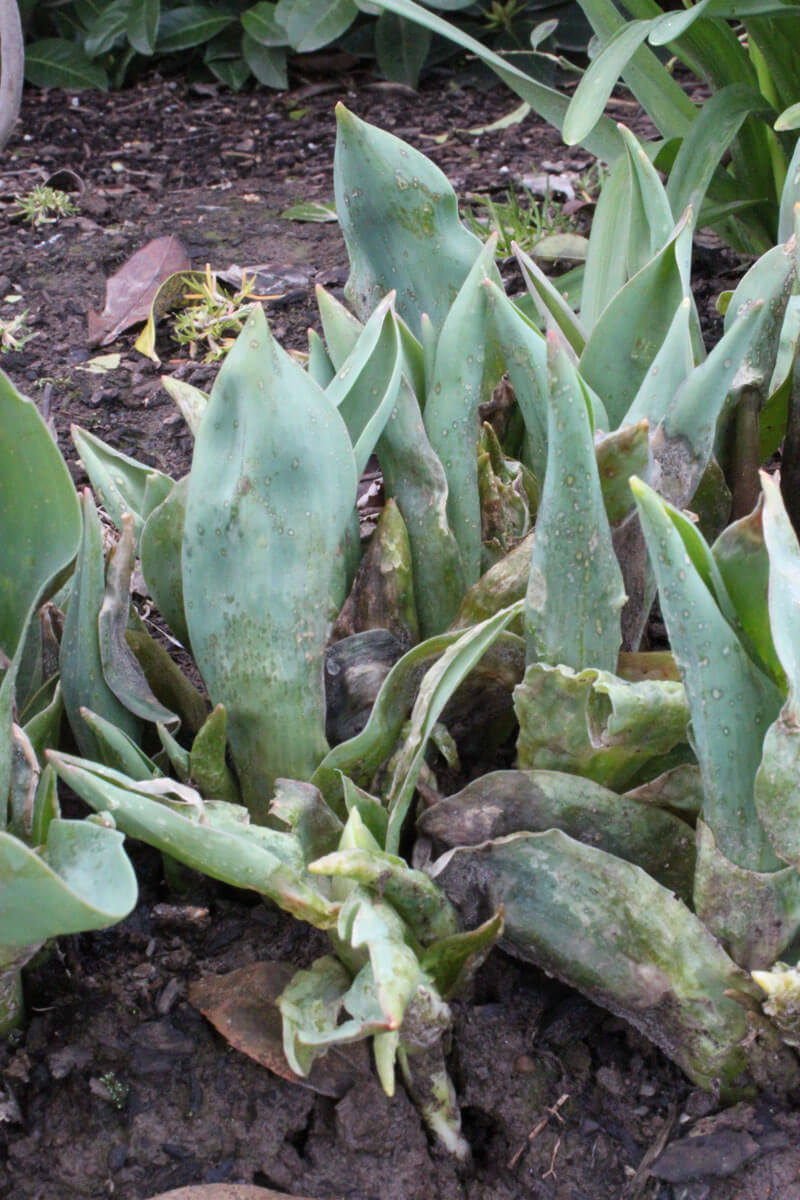

Infected Tulips Healthy Tulips
3. Snap off Heads after bloom
After your tulips finish blooming, the seed pods need to be snapped off before the flowers start to seed. This allows all the nutrients, energy, in the stem and leaves to flow to the bulb for next year’s bloom. Do not bend the stems or tie with a band. Let the stems die naturally. Perennials and annuals can be planted over the top of your bulbs to give color through the rest of spring and summer as the bulbs rejuvenate for next year.
4. Dig Every 3-4 Years for Ground planting
While you do not need to dig and divide your tulips every year; they should be dug up at least 3-4 years if planted in the ground. If you are not digging them up yearly, make sure they are not in an area of the yard where they will be watered all summer. Too much water over the summer will rot/kill your bulbs. If the bulbs are planted where you have to water, try to water only once a week or less.
Digging & Storing
If you need to Dig up your bulbs:
- Snap Seed pod off after bloom
- Let Tulips Die Down, let leaves die off naturally
- Dig Up after leaves have died off
- Store in a cool dry place with air flow
1. Snap Seed pod off
When you take the flower head, seed pod off the stem you are letting the bulb know that it can start taking nutrients from the leaves back for a healthier bulb.
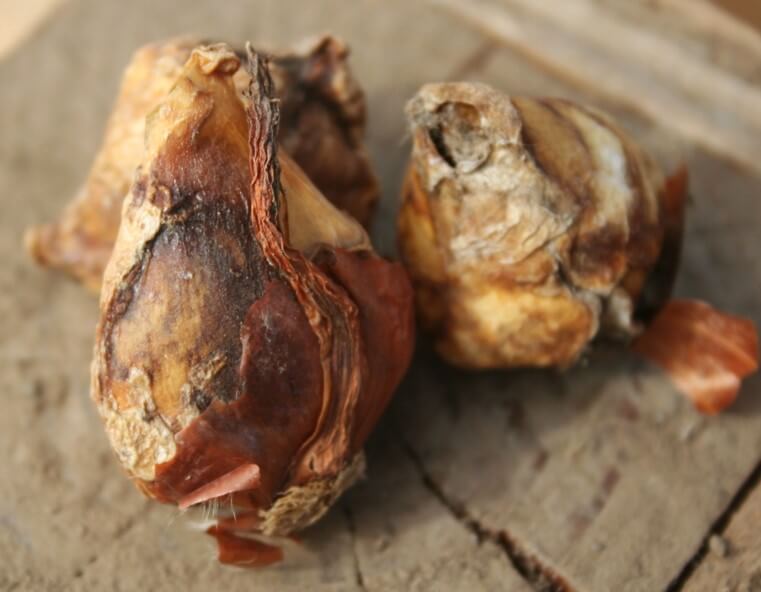
Healthy Bulbs Bad Bulbs
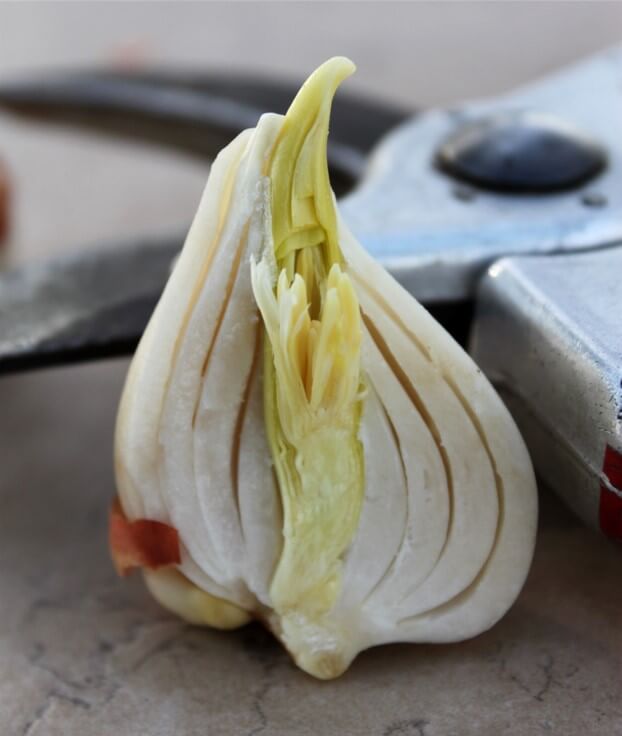
After blooming and the plant have dried down, the bulb keeps track of heat units. When they receive enough, a flower is formed for the coming season (for tulips, sometime in late July).
Flower bulbs are nature’s natural computer chips. They record the season’s temperature, moisture and air quality and when certain requirements are met, specific things happen. For example, when you plant your bulbs in the fall, a certain amount of moisture is needed for the roots to emerge. During the winter, most spring flowering bulbs need a certain amount of cold units before they will bloom.
2. Let Tulips Die Down
To best care for your bulbs, the leaves MUST be left alone until they are dry. The foliage manufactures the food that is being stored in the bulb for NEXT year’s flower.
Bulbs are actually a storage organ that helps the plant inside survive dormant periods.
- Sprinkle the seeds of wallflowers or Forget-Me-Not’s over your bulb planting in the fall. These fast growing plants will cover the leaves of the bulbs once the flower is gone in the spring.
3. Dig Up
June is a good time to lift tulips. Once the foliage on the plant has turned brown and dried, the bulbs are ready to be dug. Use a garden fork rather than a shovel to help minimize the risk of digging through any bulbs.
Tulips in cooler locations (hardiness zones 8 and under) do not have to be dug every year. To keep tulips healthy and productive, dig most tulips every three years.
Tulips do not like to be crowded, the more bulbs in their hole the smaller the bulbs become each year, and the fewer flowers that are produced.
Small bulbs produce only leaves, but if replanted and cared for, the small bulbs grow into larger bulbs that produce flowers the following year. In other words, if you have lots of leaves and little flowers it is time to dig up the bulbs and spread them out so they have room to get big enough to produce a flower.
If you only have a few leaves and small flowers the bulbs are probably getting too much water over the summer.
4. Store
Once the bulb is lifted from the ground clean off the old roots, they should separate easily from the cluster of bulbs. Separate all the bulbs; there may be different sizes and numbers under each plant.
Different varieties of tulips produce bulbs in different amounts and sizes. Of course, some years the weather may also affect your production. It is important that the bulbs are completely dry before storing or they will rot. To dry bulbs, put on a mesh tray in the shade outside for a day or two before storing them.
Store the bulbs for the summer in mesh bags, for plenty of air circulation, hung up in a cool place. An open box of wood or cardboard can be used also, but mice may more easily invade an open box.
The bulbs are alive and will suffer damage if stored in plastic or in boxes filled more than five inches in depth with bulbs. Good air circulation in storage is also important and never ever store in an airtight container. Keep the temperature below 90 F for best flowers in the spring.
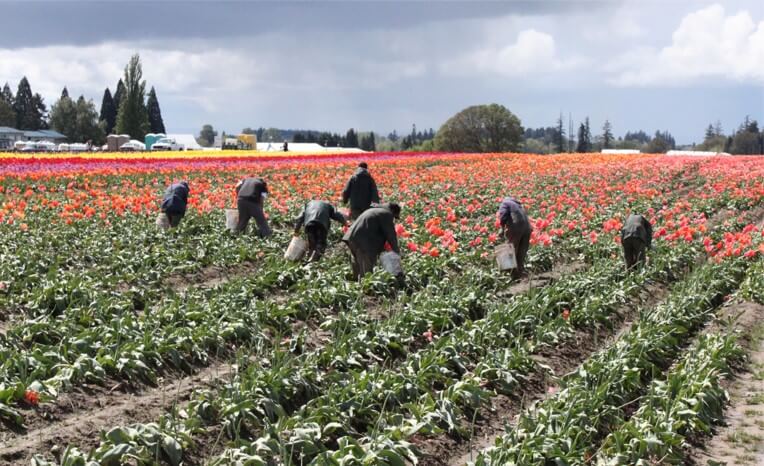
Planting & Digging Our Tulips
We plant our tulip fields in October. The bulbs are planted in raised rows with furrows to ensure they have proper drainage and to make harvesting easier. We have had the unfortunate experience of losing many a tulip planted in a low swail during a wet year. Planting is done by machines purchased from Holland. In the fall, the tulips are planted through a tube holding a net, 2 rows at a time. The net can be seen at the end of the rows.
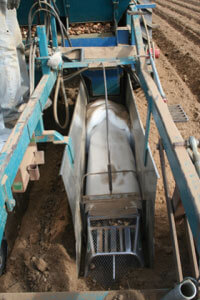
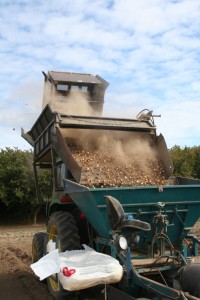
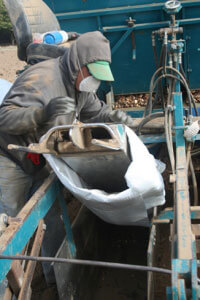
At digging, a second machine lifts the nets out of the ground and our third machine picks up the nets, splits them open and the bulbs flow into a tote that we take to our sorting shed. This system can dig the bulbs faster, leaves fewer bulbs in the field, helps us keep track of the varieties and takes almost no soil out of the field. We dig our tulips every year and rotate fields. We actually rotate all our crops using cover crops as much as possible on our farm. This helps with disease, insect, weed and erosion control. In your garden you should try to do the same by not replanting tulips in exactly the same place you dug them.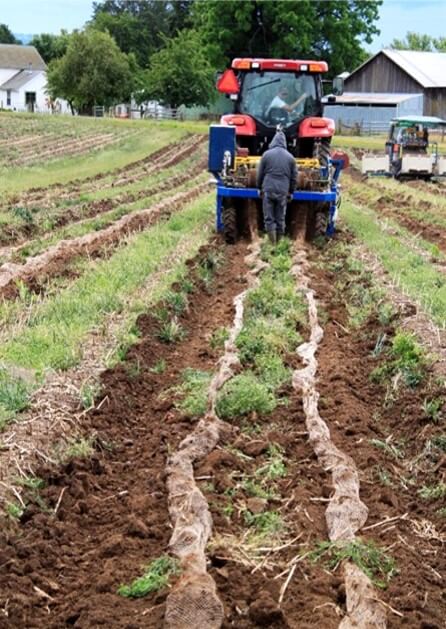
When the tulips are blooming we rogue the fields for disease and wrong colored flowers. We remove the plant by pulling it out.
After the spring show in April, our crew will remove all the remaining flower heads. This promotes a larger bulb and flower for the following year. We also let the stems die down naturally before harvesting them in June.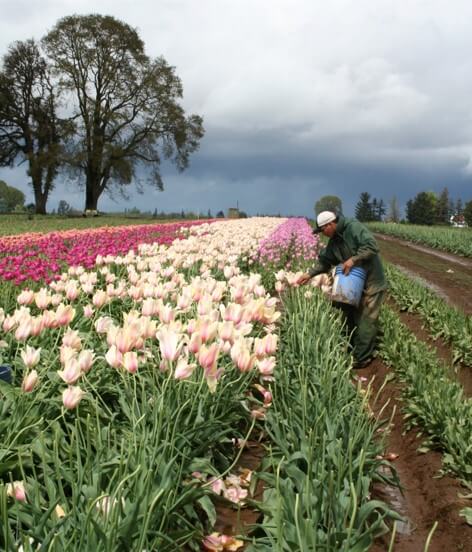
Our Cut Flowers
There can be tulips in bloom for over 8 weeks. The early varieties bloom as early as late February and the late varieties bloom in late April. The majority of the tulips start blooming at the end of March depending on the weather.
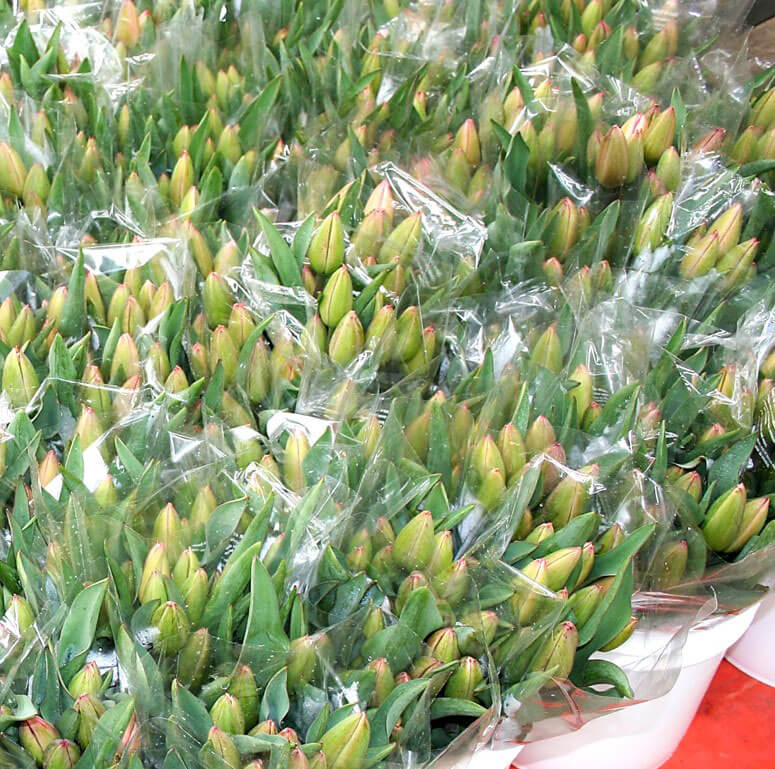
We pick barely open flowers. All picking is done by hand. After picking our tulips in the field, they are taken to our barn where they are washed, immediately wrapped in clear cello to protect the flowers then placed upright in trays. The flowers are then moved into cold storage (33°F) and placed in a container with water. These steps are important in lengthening the life of the flower.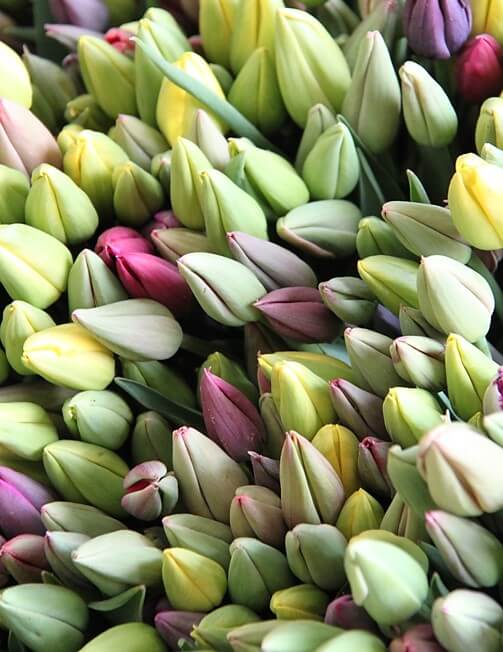
Tulips can last up to 8 hours without water. They will take 1 to 3 days to open, depending how much color is showing when purchased.
After a variety has finished blooming, we remove the flower and seed pod before the petals drop. This is called topping. Topping is done by hand to minimize the spread of tulip virus. The virus varies the color of the flower and foliage. Topping the flower also removes the seed pod so that the remaining energy goes into the bulb for next year’s flower.